Ah, the late-January Blahs, effects of grey skies, chilling winds, and the endless scraping of car windshields - and I know I’m not the only one that spends long afternoons daydreaming of sandy beaches, bright summer clothing, and plus-zero temperatures. But, instead of wishing for warmth and colour outside, why not bring it inside? Enter tagines, the simple Moroccan cookware that inspires recipes chock full of colourful ingredients.
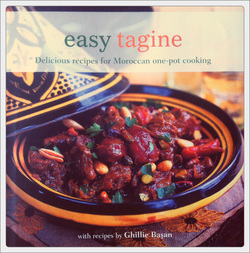 Admittedly, I had no idea what a tagine was until recently, when I came across the book easy tagine by Ghillie Basan. This book is a great resource, and is full of fantastic recipes, cultural anecdotes, and beautiful photographs of every dish.
A tagine is a stew of meat (lamb, traditionally), poultry, or vegetables, simmered in sauces with fruit, honey, herbs, nuts, and chillies. It is also the name of the vessel in which the stew is cooked – a shallow earthenware dish with a funny, cone-shaped lid. (The lid is designed to circulate the air and steam within the vessel). Traditional tagines have a hole in the top of the lid, designed to release steam while cooking. Many modern tagines don’t have this feature; thus, it is advised to lift the lid periodically during cooking to release some steam, (and prevent the stew from boiling over!)
 Tagines come in many different colours and materials, from unfinished clay to vibrant works of art, hand painted and glazed. Typically, these fancy numbers are used for serving, while the plain ones are used for cooking the stew. Some of the newer, factory-produced clay tagines are not heat stable and will form cracks when used over an open flame. Le Creuset, however, makes a lovely, glazed model with a cast-iron base that is more durable (although pricey). You don’t need to own tagine to prepare these Moroccan recipes, though. I use a large, stainless-steel saucepan with a fitting lid, about 4-inches deep. When used over a gas stove on medium-low setting, it simmers perfectly (just remember to let the steam escape once in a while!) The stew can be baked in the oven, as well, in either an earthenware tagine or a metal saucepan, just set your oven temperature to 375°F. (Note: Air is not a good conductor of heat, so the tagine will not bake as quickly in the oven as it would directly over an open flame or element. Baking time will be about 1.5-2× what the recipe states. For example, if the recipe says to cook for 30 minutes, bake for 45-60 minutes. This is especially true when cooking hard vegetables like potatoes, carrots, or squash.)
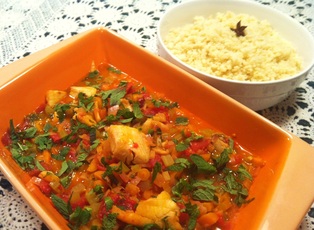
Here is a recipe from easy tagine that I tried out for a family dinner a few nights ago. I served it with couscous (but flat bread such as pita or naan would be great, too!) It was quick and simple to make and got rave reviews.
I have put some of my own variations and suggestions in italics.
CB
fish tagine with preserved lemon and mint
serves 4
1 quantity Chermoula (recipe follows)
2 lbs. fresh fish fillets, cut into large chunks (I like tilapia)
2-3 tablespoons olive oil
1 red onion, finely chopped
2 carrots, finely chopped
2 celery stalks, finely chopped
1 preserved lemon (or the peel of one fresh lemon), finely chopped
1 14-oz. can plum tomatoes with their juice
2/3 cup fish stock or water (or vegetable stock)
2/3 c white wine
sea salt and freshly ground black pepper
leaves from a bunch of fresh mint, finely chopped
Reserve 2 teaspoons of the Chermoula for cooking. Toss the fish chunks in the remaining Chermoula, cover and refrigerate 1-2 hours.
Heat the oil in a tagine (or a heavy, shallow saucepan with a lid). Stir in the onion, carrots and celery and sauté until softened. Add the preserved lemon (reserving a little for sprinkling) with the reserved 2 teaspoons of Chermoula and the tomatoes and stir in well. Cook gently for about 10 minutes to reduce the liquid, then add the stock and the wine. Bring the liquid to the boil, cover the tagine, reduce the heat and simmer 10-15 minutes.
Toss the fish in the tagine, cover and cook gently for 6-8 minutes, until the fish is cooked through. Season to taste with salt and pepper, sprinkle with the preserved lemon and the shredded mint leaves and serve immediately.
Chermoula
2-3 cloves garlic, chopped
1 fresh red chilli, chopped (or 2 tsp chilli paste, such as Sambal Oelek)
1 teaspoon sea salt
a small bunch of fresh cilantro
1 pinch of saffron threads (I omitted this)
1-2 teaspoons ground cumin
3-4 tablespoons olive oil
freshly squeezed juice of 1 lemon (use the same lemon that you peeled for the tagine)
| | I love using this simple recipe with parents and children to teach how easy and fun cooking. I'm heading off to a private in-home cooking class now to teach this recipe along with salad rolls and frozen yogurt with a 3 and 6 year-old... it's going to be fun!
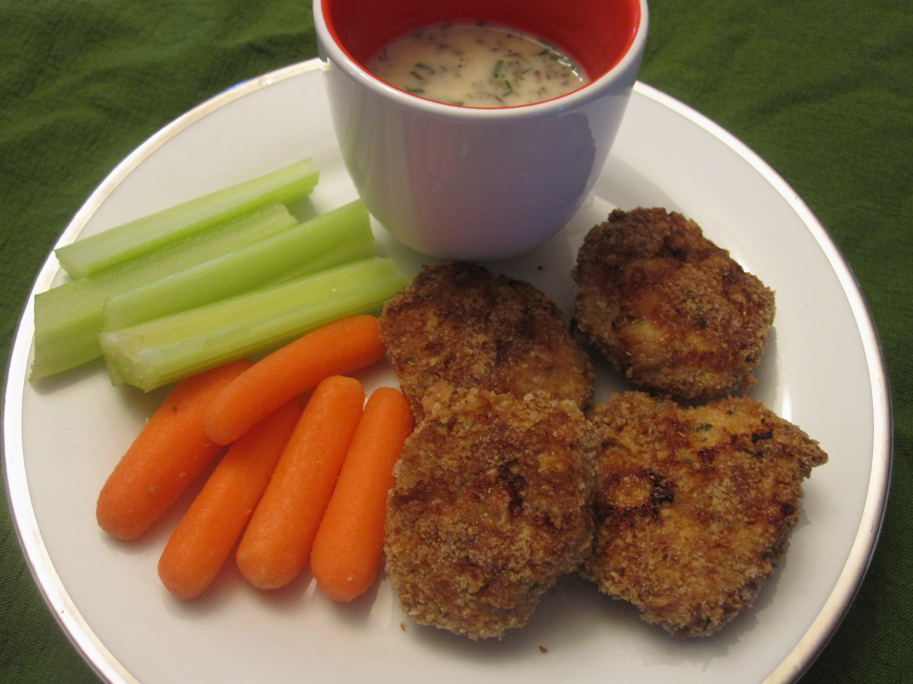
There is no mise en place needed, meaning nothing to prepare ahead of time, and lots of in-active time so that you can focus on a second recipe while these are cooking. Adam has a saltier version with Doritos... maybe he'll share next week ;-)
| Chicken nuggets
Makes 24
Ingredients:
2 lbs ground chicken, local, free-range or organic preferably
1 medium onion, chopped fine
2 cloves garlic, minced
Olive oil
2 egg
1 1/2 Tbsp Worcestershire
1/2 cup breadcrumbs
Extra breadcrumbs or cornflake crumbs for breading
2 tsp EACH thyme and parsley
1 tsp ground pepper
Pinch of salt
Instructions:
1. Heat 1 Tbsp olive oil in a metal pan on medium heat. Add onion and cook for 5 minutes until soft & translucent. Add garlic and cook for 2 minutes more.
2. Place chicken in a bowl and add onion & garlic, egg, Worcestershire, breadcrumbs, thyme, parsley, pepper and salt. Mix well.
3. Form into 24 balls (about 1 oz each) and flatten slightly. Place extra crumbs on a large plate and coat both sides of the nugget in crumbs.
4. Line a cookie sheet with parchment paper and place the nuggets on the sheet. Bake at 425° for 20 to 25 minutes until crispy and cooked throughout.
5. Serve with veggies & tzatziki or in a pita or wrap with salad.
Much love & good eating,
Stephanie
‘Tis the season for holiday parties – and party foods! But try as you might not to overdo it at the buffet table, it can be hard to eat a balanced diet this time of year. And with eggnog-flavoured everything, who can blame you? Grocery stores, too, are introducing their holiday product lines. While typically not the “healthiest”, or containing the most (read: any) servings of fruit, vegetables, and whole grains, they are certainly the most glamorous dish on the table.
So, what do these store-bought party foods have that good old fashioned veggies and dip don’t? (And please don’t say “everything”). 3 things put the spotlight on these dishes:
Looks and Novelty - Move over fruit-kabobs! 2012 is the year of the bacon-wrapped meatball.
Easy Preparation - Package to plate; maybe a little oven time. It cannot get much simpler.
A Small Price Tag - Usually no more than $10.
How on Earth can our go-to nutrient-dense snack foods compete with the new stars of the snack table? Easy! Just copy these store-bought treats’ success strategies, and:
Make it beautiful - Play around with presentation, fancy plates, and garnishes. (This is a great way to practice those knife skills).
Keep it simple - 5 ingredients to purchase (i.e. not pantry staples) and 5 dirty dishes. Maximum.
Set a budget of $5-10 - Generally, if your recipe is simple, this will not be an issue.
The hardest part is coming up with a recipe that fits the bill, but there are plenty of sources for inspiration. Type “5 ingredients or less” and “snacks” or “party foods” into the Google Search box. Ta-da! Or, you could tweak a snack that you make all the time, and make it party-worthy.
Cheese and crackers = Caprese Snackers! Spread cream cheese on Triscuits and top with cherry tomato slices and fresh basil.
Popcorn = Black Pepper Honey Popcorn! Toss stove top popcorn with warmed honey, black pepper, and a bit of olive oil.
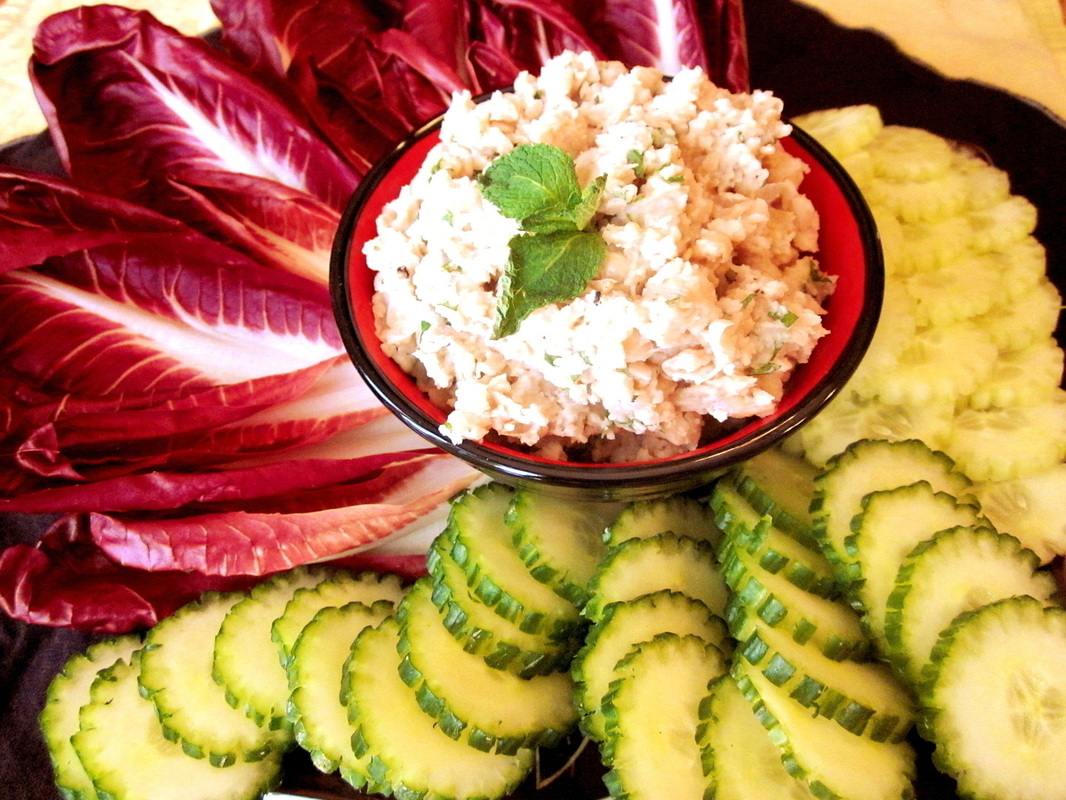
As for that dated veggie and dip plate? Rejuvenate it with a unique dip and colourful veggies sliced and arranged like a work of art. Here is a recipe for a basic White Bean Dip that is really versatile. Play around with different herbs, spices, and beans. Be creative and adventurous, anything goes! (Except, maybe, eggnog-flavoured...)
CB  White Bean Dip with Mint
Preparation Time: 10 minutes
1 can (15oz) white kidney beans (rinsed and drained) (99¢)
1 ½ tablespoons lemon juice
1 ½ tablespoons olive oil
1 teaspoon ground cumin
1 clove garlic, finely chopped (10¢)
1 tablespoon fresh mint, finely chopped (20¢)
1 English cucumber ($1.50)
1 red endive ($2.15)
Total Cost (not including pantry staples): $4.94
 - Dip: In a bowl, mash the beans with the lemon juice, olive oil, and cumin with a potato masher or a fork. Stir in the garlic and mint.
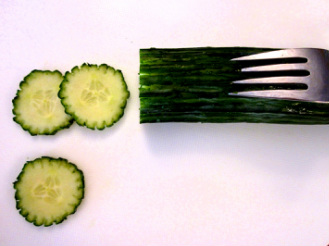
- Cucumber: Peel the cucumber, if desired. With a fork, scrape grooves along the length of the cucumber. Slice.
 - Endive: Carefully peel apart the leaves and cut about ½ cm off the bottom of each leaf.
- Scoop the dip into a serving bowl; arrange the cucumber slices and endive leaves on a serving plate and serve with the bean dip.
The long days of sunshine are behind us. The temperature continues to drop. Yes everyone, winter is upon us. At first glance, this may seem a little dreadful. However, this change of season brings forth a number of familiar recipes that are prepared to not only provide nourishment and comfort, but also warmth! Old favourite recipes such as stews, soups, casseroles or chilli are relied upon more often during the winter to both warm the kitchen, and the soul.
I enjoy teaching my clients about these types of dishes as they allow for a number of teaching moments to be covered during a demonstration. A dish such as beef stew can highlight the advantage of searing meat for flavour development, ability to use a more economical piece of beef, incorporation of vegetables, and the use of thickening agents. For clients that are cooking for one or two, these types of dishes are a perfect way to stretch their efforts in getting multiple meals out of one recipe.
As I prepare for the fourth instalment of winter warm-ups at my CHC I am looking to expand the selection of recipes to include more cultural dishes and meals that are more unique to my clients. A number of my clients grew up on meat and potatoes, so many are confident with their ability to prepare soups and stews, and have done so for many years during the winter. Curry however is a different story! Some clients are timid when it comes to sampling curry dishes, and some even turn their nose up at the mention of the dish. Yet when I ask these clients where the distaste for curry started, many report on having tried curry only once or twice and being overwhelmed by the aroma or spice. This provides a great opportunity to discuss the fact that there are hundreds of different variations of ‘curry’ and each recipe is unique. Exploring the spices that are often involved in preparing a curry such as cumin, tumeric, coriander and chillies allows for clients to become a little more comfortable with the ingredients being used and helps break down some preconceived notions about the dish.
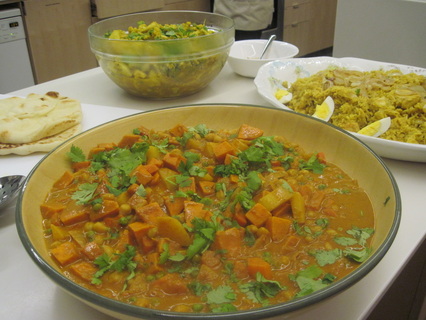 I have decided to include the recipe below in my winter warm-ups class next week for a few reasons. First, this is a mild tasting curry that is more sweet and savoury rather than spicy, which I know is what my clients prefer. Second, it is a vegetarian friendly recipe which will compliment other meat based dishes being shown in the class. And lastly, this recipe is very quick to prepare and will highlight that one pot meals don’t always have to simmer for hours.
Sweet Potato and Chickpea Curry
Serves 6
2 tbsp olive oil
1 onion, finely chopped
2 large carrots, peeled, cubed
2 cloves garlic, finely chopped
2 tbsp green curry paste OR 1 tbsp curry powder (more if desired to be spicy)
½ can light coconut milk
1 cup low sodium vegetable stock (or chicken stock)
1 cup tomato puree (or plain sauce)
2 medium sized sweet potatoes, peeled, cubed
1 can chickpeas
½ cup green peas
1 bunch fresh cilantro (optional)
1 Over medium heat, in a stainless steel pan, add the olive oil. When oil is hot, but not smoking, add the onions and carrots and cook until some browning occurs on the bottom of the pan, about 5-7 minutes.
2.Add the garlic and cook for 30 seconds
3. Add the curry paste (or powder), stir to incorporate and cook until very fragrant, about 1 minute
4.Add the coconut milk and stir to release any browning from the bottom of the pan.
5. Add the stock, tomato puree, sweet potatoes, and chickpeas. Simmer over medium-low heat and cook until vegetables are soft and sauce has reduced in volume by ¼. (If the sauce is still runny, continue to simmer until desired thickness).
6. Add the green peas, stir to incorporate and cook for 2-3 mins.
Remove from heat, serve curry over basmati or jasmine rice and top with cilantro
When ever I run a cooking class or demonstration for my clients at the Port Hope CHC, I always look to see if I can include any vegetables that are in season and available from a local source within the community. I find that if I can incorporate fresh local vegetables that are readily available into my lessons, then clients are much more likely to try these recipes at home. During this time of year, it becomes a little more difficult to highlight local seasonal produce as most gardens have been put to bed for the winter. Over the next few months, I know the reliable root vegetables will be sneaking into quite a few dishes. However, root vegetables were a stand alone theme last week, so in planning for this week, I knew I would need to look elsewhere for variety. I actually did not have to look very far! Even though most gardens are empty, our modest CHC Sharing Garden has one vegetable that is able to keep on giving through the winter months....KALE!
 I have used kale a number of times in cooking classes and demonstrations. It has been sauted with garlic, added to soups, dried into 'chips', chopped finely into a 'kale slaw' and even used for smoothies!
 This week, I will be teaching a class all about pasta. My goal is to show
clients how to add flavour and variety to pasta dishes, and to explore some
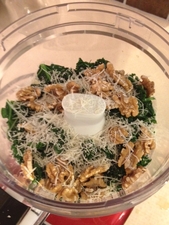
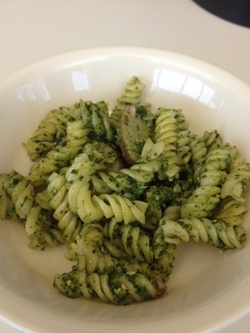
unique ways on how to include vegetables into these recipes. To highlight the kale, I have decided to try my hand at turning these leafy, sponge like greens into a pesto! Pesto is such a versatile spread. It can be used as the base of a pasta or pizza sauce, added to scrambled eggs, as a condiment on sandwiches, or as the start of a salad dressing.
 Kale Walnut Pesto
5 cups fresh kale, torn, ribs removed
¼ cup walnuts
1 clove garlic, peeled (more if desired)
¼ cup fresh grated parmesan cheese
Fresh ground pepper to taste
Pinch of salt
¼ cup extra virgin olive oil
Blanch kale for 3-5 minutes or until kale has wilted and softened. Drain, and squeeze out excess water.
In a small food processor, add all of the ingredients expect for the oil. Blend for a few seconds to roughly mix ingredients together. Add 1 tbsp of oil to the mixture, blend for a few seconds. Add another tbsp of oil, blend again. Repeat until the mixture is smooth and oil has been incorporated. Add 1 tbsp of water if consistency is too thick.
Keep covered in fridge for up to 5 days.
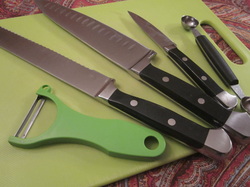 First, what to use – and how to use it!
1. Pick a knife that feels good in your hand. The three knives that you will use most are a paring knife, a serrated (bread) knife, and a French (Chef’s) knife – there is nothing you cannot prepare with these. Of course, some less versatile tools make certain cutting tasks so much easier, so feel free to expand your knife kit to fit your needs. (My guilty pleasures are a vegetable peeler and a melon baller).
2. Keep your knives sharp, clean, and dry – moisture can dull the blade.
3. Hold the knife with your middle, ring, and pinky fingers gripping the handle, and your thumb and index finger pinching the blade.
4. When cutting, keep the tip of your knife on the cutting board and use the back of the blade to cut in a rotating motion. (The tip moves back and forth on the board while the handle moves up and down).
5. The Claw. This is a tricky move that takes practice, but keeps your fingers attached! Hold down the food with the tips of your fingers. Your knuckles should be parallel to the blade in your opposite hand. To prevent the food from slipping as you are cutting it, stick out your thumb and pinky like you are making an imaginary phone call and place them on the cutting board on either side of the food to hold it in place. Gently rest your other three fingers, tips down, on top.
 Next, some uncommon tips for common ingredients:
6. Tomatoes – Using a serrated knife to slice through the skin is the best way to not squish the vegetable – but poking the tip of a chef knife into the skin to start it off works well, too! When dicing the edge piece, turn it skin side down; it is much easier to slice through the skin this way, and you avoid squishing the flesh underneath.
7. Citrus – No zester? No problem! Use a veggie peeler to slice off the rind. Before you juice the fruit, roll it – firmly – on the cutting board first to break up the membranes. When the juice starts leaking from the skin, it is ready to go; and if you don’t have a citrus reamer, a pair of tongs or a fork will do the trick.
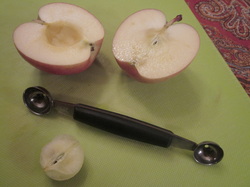
8. Apples – Instead of frustrating yourself by trying to remove the core with a paring knife, slice the fruit in half and scoop out the core with a melon baller. Bonus: the two halves are much easier to dice now that they are flat on the cutting board.
9. Leafy herbs, like basil – Layer the leaves on top of each other and roll into a tight bunch and slice.
10. Round things, like onions and potatoes – While slicing the veggie in half and putting the flat side down makes it easier (and safer) to cut, sometimes you want round slices for recipes like onion rings or scalloped potatoes. In this case, slice just ¼ inch off one side of the veggie and put the cut-side down on the board. This will provide stability without making your onion rings into half-moons instead!
By Claire Bowley
This week we held our second Demos for Dietitian workshop at the Kitchener Market. We would like to thank all 40 participants for joining us for such a fun day, I know everyone learned so much. What an inspiring bunch of woman (yes all 40!) out in the world making a difference teaching nutrition through REAL food. We hope you keep in touch - send us your success stories, resources you love and recipes you teach in your classes. This Demos for Dietitians community will continue to grow and support each other with your help. We can't wait to visit Ottawa in less than 2 weeks for our final workshop this year... see you at DiVino Wine Studio November 6! In today's post we want to feature a really cool project by the Perth District Health Unit in Stratford. They started a blog with how to videos, recipes and information about healthy eating called: Diaries of a Dietitian. They are also on Pinterest and have 20 pins with lovely pictures, great work! Using social media is a fantastic way to share your message and connect with potential clients whether you are working for a non-profit or for-profit organization. We are so proud of your efforts and think you are inspiring to other RD's in demonstrating how to use Social Media in nutrition education and highlight real food solutions. The Diaries of a Dietitian most recent post is how to cook a spaghetti squash and roast a butternut squash. Visit the post here: How to Cook & Roast Squash and check out their cool video below! Thanks so much for sharing Shannon! Keep up the good work. Much love & good eating, Stephanie
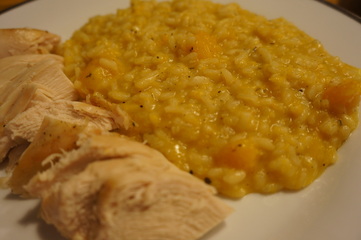 Last night, I was invited to do an in-home cooking class with one of my clients. In a 90-minute class we cooked the smokey quinoa and peppers first(everyone loves this recipe), then a beautiful butternut squash risotto and pan-fried cod. In an in-home class, you need to make time for client involvement and several teaching moments. In this class those were:
1. How to brown meat & deglaze a pan
2. How to make a perfect risotto from scratch
3. How to balance out the right portion of vegetable, starch and protein in a meal
It's important to be well-organized, have an outline of how you will teach multiple recipes and prepare a few food items to save time.In this class I peeled and diced the squash, chopped the onions and had the rice measured out. With a few steps done ahead of time, I could fit these three hands-on recipes in 90 minutes! Here is this delicious, sweet and smoot risotto recipe - this is the same one we taught in our very first Demos for Dietitians workshop.
Makes 6 servings
Ingredients
1 small (4 to 5 cups) butternut squash
Olive oil & butter (optional)
2 tsp cinnamon
1 small onion, minced
2 cups Arborio rice
1/2 cup white wine
8 to 10 cups vegetable or chicken stock/broth
1 tsp dried sage or 1 tbsp fresh
Dash cayenne pepper
Handful of Parmesan cheese
Instructions:
1. Preheat oven to 425°F. Quarter squash and scoop out seeds with a spoon. Rub flesh with olive oil and sprinkle cinnamon. Place in oven and cook for 45 minutes, until tender. Option two: peel and dice squash. Toss in olive oil and cinnamon. Cook for 20 to 25 minutes or until tender.
2. Place stock in a medium pot. Bring to a boil. Reduce heat and simmer.
3. Heat 1/2 tbsp olive oil and 1/2 tbsp butter (or just use olive oil) in a large, heavy-bottomed pot on medium heat. Add onion and sauté for 5 to 7 minutes.
4. Add rice to pot, toss to coat with olive oil (1 minute). Turn up heat to medium-high and add wine. Allow to cook until no liquid remains in bottom of the pot (1 minute). Add stock one ladle full at a time. Allow the rice to absorb and then add another ladle full. After 4 ladles of stock - reduce heat to medium.
5. After 15 minutes, add cooked squash, a dash of cayenne and dried sage if using. Continue to add stock for 5 to 10 minutes longer, until desired tenderness is reached.
6. Finish with parmesan cheese and fresh sage (if using instead of dried sage). Season as desired.
Much love & good eating,
Stephanie
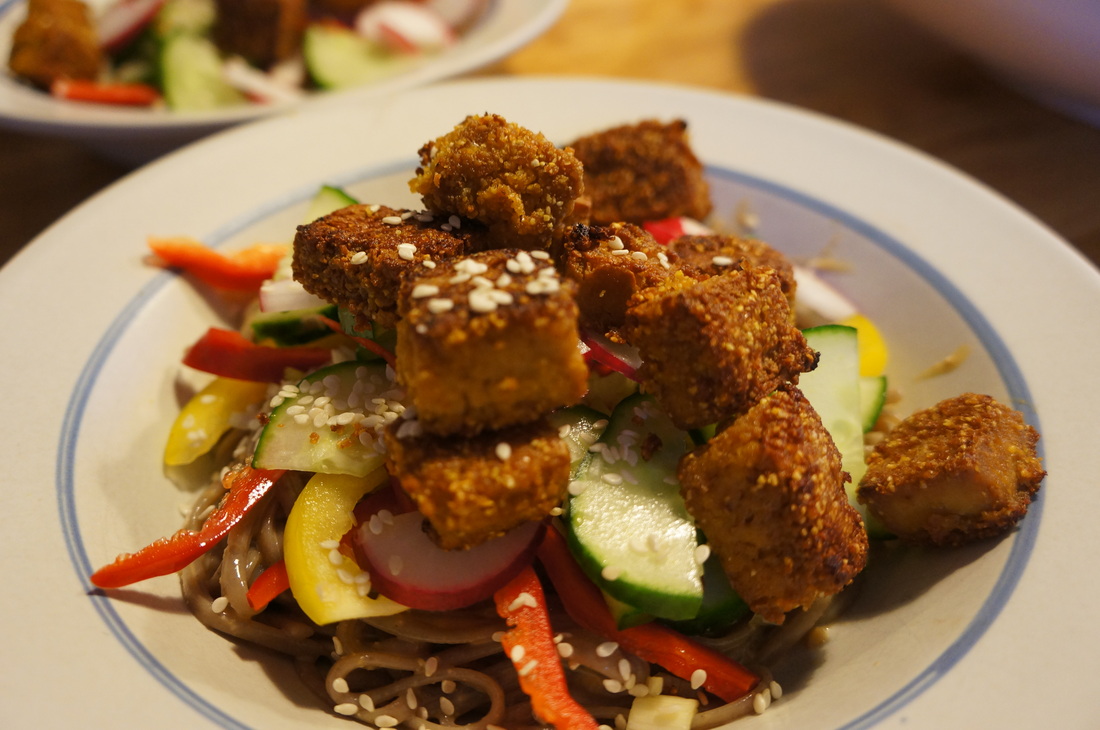
This is one simple and delicious recipe! I did this recipe at a live corporate wellness presentation for the City of Kitchener, with 20 audience members along with 3 other recipes for healthy eating at work that included spiced nuts as a snack, tempeh bacon, avocado & tomato sandwiches and mini berry cheesecakes for dessert. In this recipe, I prepared the vegetables before the demo, made the dressing first in front of everyone and set aside, while I worked on other components of the demo. Near the end I added the noodles to a big pot of boiling water and served with other lunch items. I served the bowl with roasted chicken, which baked in the oven as it was less active than making the tofu and I had other things I wanted to show during the 90-minute demo. It's pretty yummy, try it at home tonight!
RECIPE: Peanut noodle bowl with fresh vegetables and crispy tofu, can also serve with shrimp or chicken
STYLE: Live demonstration, along with 2 or 3 other recipes
COOK TIME: 15 to 20 minutes (one inactive component, one active component)
THEMES: Balanced eating, Diabetes, Heart Health, Gluten-free (use GF soba noodles or rice noodles), low FODMAPS
Ingredients:
Peanut sauce
1 Tbsp EACH sesame oil, olive oil, miso, and honey or maple syrup
2 Tbsp peanut butter (no salt, no sugar)
3 Tbsp rice vinegar
1 tsp grated ginger
Noodle Bowl
1 package soba noodles
4 to 6 cups fresh vegetables (bell peppers, cucumbers, radishes)
Protein of choice—3 oz shrimp or chicken OR crispy tofu
Sesame seeds *optional
Instructions:
1. Prepare protein food, chicken, shrimp or tofu.
2. Add all sauce ingredients to a blender or “magic bullet” and whiz together until well-combined. Set aside.
3. Meanwhile bring a large pot of water to a boil Add noodles and cook according to package directions.
4. Prepare vegetables by cutting into thin slices. Once noodles are done cooking, mix with peanut sauce and place into 4 bowls. Top with vegetables, protein choice and sprinkle sesame seeds on top as desired. Serve immediately.
Enjoy!
Much love & good eating,
Stephanie
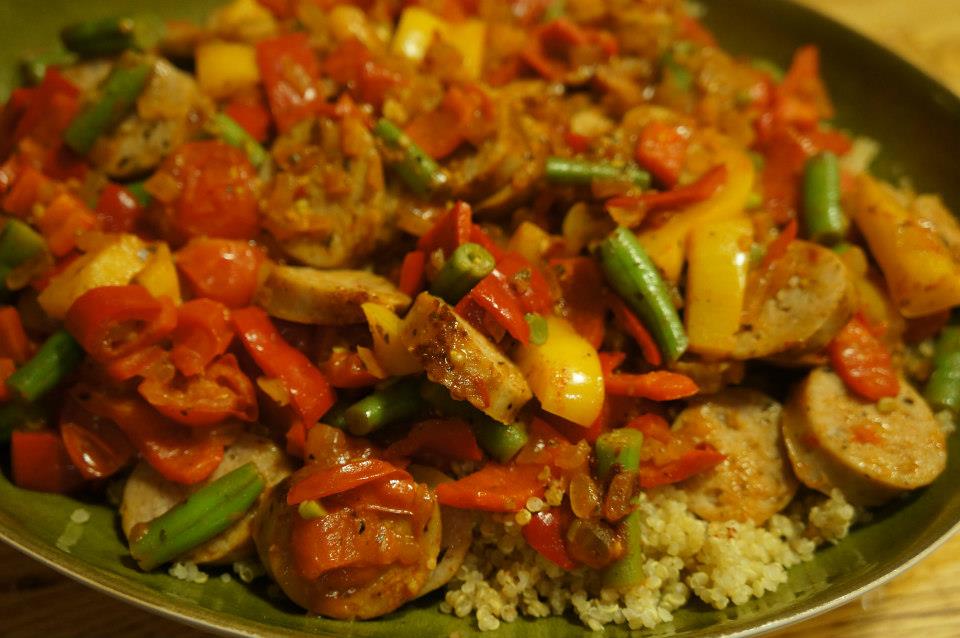
I taught this recipe on stage to a group of 45 to 50 senior's at a diabetes wellness fair in September. This recipe has quite a few steps and I was able to use it to highlight browning of meat, deglazing the pan to create flavour with beer... which the audience loved, and the perfect way to cook quinoa. Each of my recipes includes 2 cups of vegetables per serving and I show this in my demonstration to present what balanced portions should be in a recipe. Everyone had a sample and loved it! RECIPE: Smokey quinoa with sausage & pepper
STYLE: Live demonstration
COOK TIME: 25 to 35 minutes (mostly active)
THEMES: Balanced eating, Diabetes, Heart Health, Gluten-free (use GF sausages), low FODMAPS (remove onions if bothersome)
Ingredients:
1 1/2 cup quinoa (uncooked)
1 Tbsp olive oil
1 lbs lean pork or chicken sausages
1/2 cup beer
1/2 onion, diced
1/3 of a chili pepper or more as desired
4 large bell peppers (red & yellow), diced
1 cup green beans, diced
1 tsp smoked paprika
1 tsp chili powder
1/2 tsp each basil and parsley
2 cups diced tomatoes
Pinch of salt & pepper as desired
Instructions:
1. In a medium saucepan, add 2 1/4 cups of water and 1 1/2 cups quinoa. Bring to a boil, reduce heat, place the lid on the pot and cook for 15 minutes.
2. Meanwhile, in a medium sauté pan, heat the olive oil on medium-high. Add the sausages and cook until brown, about 5 minutes. Add 1/2 cup of beer, place lid over top, reduce heat and cook until done, 10 to 15 minutes.
3. While sausages are cooking, prepare vegetables.
Once sausages are cooked, remove from pan and set aside. Add onions to hot pan and a splash more beer. Cook 5 minutes. Add chili, bell peppers, green beans, paprika, chili powder, basil, parsley, salt and pepper. Cook 3 to 4 minutes. Add tomatoes and cook 3 to 5 minutes more until desired tenderness is reached. Slice sausages and add to pepper mix. Stir in quinoa and serve.
Much love & good eating,
Stephanie
|
 RSS Feed